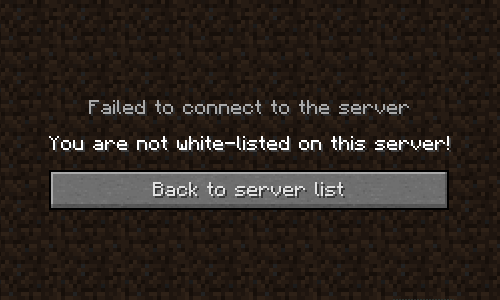
A white list is your main means of blocking any unauthorized entry into your Minecraft server. It is only the official Minecraft usernames that you put on the list that will be permitted to enter the server, while those that are not on the list will not be granted access.
Why Do You Need to Whitelist Your Minecraft Server?
It is important to have a whitelist if you plan to create a private server. This will allow players that you have added to the whitelist to connect to your server. Anyone else that tries to connect to your server will be blocked, thereby keeping your server secure and private. This is important for safety reasons because, even though you’re the only one that is expected to know the IP address, your friends may sometimes give out your IP address to others that may want access to your server.
Options for Whitelisting your Minecraft Server
Whitelisting Minecraft Server for Java Edition
- Go to the Game Panel.
- Open the console (located at the left of the panel), type “whitelist on,” and press enter.
- When you do this, you will see a message that reads, “Turned on the whitelist.” This message confirms that you have successfully activated the whitelist.
Whitelisting Minecraft Server for the Bedrock Edition
- Go to the Game panel and stop the server.
- Click on “Config Files” (located on the left of the panel) and click on “Server Settings.”
- Locate “Whitelist,” change it to true, and click on “save.”
- Go back to the game panel and start the server back up.
Whitelisting Minecraft Server Through Multicraft
- Sign into Multicraft and choose your server.
- Click “Server Configuration” (left side menu).
- Change the “Whitelisting” option to “Enabled.”
- Click “Save” (located at the bottom of the list).
- Go back to the main server page by clicking the “Back” button on the left side menu.
- Click “Console” (located on the left side menu).
- Type one of the whitelist commands in the text entry box and click “Send” to send the command you typed to the server.
Whitelisting Minecraft Server Through Game Chat
If you are an OP on the Minecraft server, you can use the following commands in the game: Press the / key to start typing a command. You need to do this before a command (failure to do this will make the command send as a chat message in-game instead of being executed). To enable the whitelist, run the “whitelist on” command in the chat. You can then add anyone that you want to the whitelist, and it will prevent anyone that is not on the whitelist from joining. You can manage the whitelist from the game through the use of the whitelist commands.
How to Test the Whitelist
Switch on your computer and start Minecraft, then try to connect to your server. You will see, “You’re not connected on the server.” If you can still join the server, then you need to do the following manually so that you can turn on the white list:
- Sign in to Command Center.
- Find the server that you want to modify from the server list, then click “Manage” (located on the right).
- Click the “Files” tab (located above the console).
- Open “server.properties” and find the line that contains “whitelist=”
- Change “false” to “true” and save the file.
- Restart the server.
How to Add Players to the Whitelist
From your console, type “whitelist add playername,” then press enter. Replace “playername” with the name of the player that you want to add to the whitelist. For instance; whitelist add MinecraftPlayer579
How to Remove Players from the Whitelist
From your console, type “whitelist remove playername” and hit enter. Replace “playername” with the name of the player that you want to remove from the whitelist. For instance; whitelist remove MinecraftPlayer579
How to View Players in the Whitelist
To view players in the whitelist, type “whitelist list,” then hit “enter.” Do this on your console.
Turning Off the Whitelist
To turn off the whitelist, type “whitelist off,” then hit “enter.” You also need to do this in your console.
Common Issues That You Can Encounter
You can get the “Not implemented” message when you try to activate the whitelist from the console. In Bedrock Edition, the whitelist must be enabled via server.properties. Stop the server and go to “Config Files.” Then click “Server Settings” and change “whitelist” to true. When you’re through, hit “save.” After doing that, start the server and add players using the “whitelist add playername” command.
Wrapping Up
Whitelisting your Minecraft server is an effective and simple way of limiting your server to those that you trust. You will be able to secure your server by restricting those that can join your server and those that cannot. This helps to prevent unauthorized players from connecting to your server and destroying your gaming experience and creating loopholes in your security. This guide has shown you the different options that you can use to whitelist your Minecraft server and enjoy the aforementioned benefits.

